
To waterproof your nest boxes effectively, position them in sheltered areas away from direct rainfall and elevate them off the ground. Install drainage holes at the bottom to prevent water pooling. Apply marine-grade waterproof sealants to all surfaces, especially seams and edges. Add rubber stripping where the lid meets the box to create a watertight seal. Install a sloped roof with a 12-18 inch overhang for additional protection. These techniques will keep your feathered visitors dry and comfortable throughout nesting season.
5 Best Ways To Waterproof Your Nest Boxes

While many bird enthusiasts focus on the design and placement of nest boxes, waterproofing often gets overlooked until the first heavy rainfall. Protecting your nesting boxes from moisture is essential for the health and safety of their occupants.
Start by installing a sloped roof to divert rainwater away from critical areas, particularly hinges. Choose marine-grade plywood for durability, then apply waterproof sealant to all surfaces. This creates an effective moisture barrier that extends the life of your boxes.
Don’t forget to add rubber stripping where the lid meets the box to prevent water seepage. Installing small drainage holes at the bottom helps manage any moisture that does get in, keeping bedding dry.
Remember to inspect your waterproofing regularly, checking for cracks and reapplying sealant when necessary.
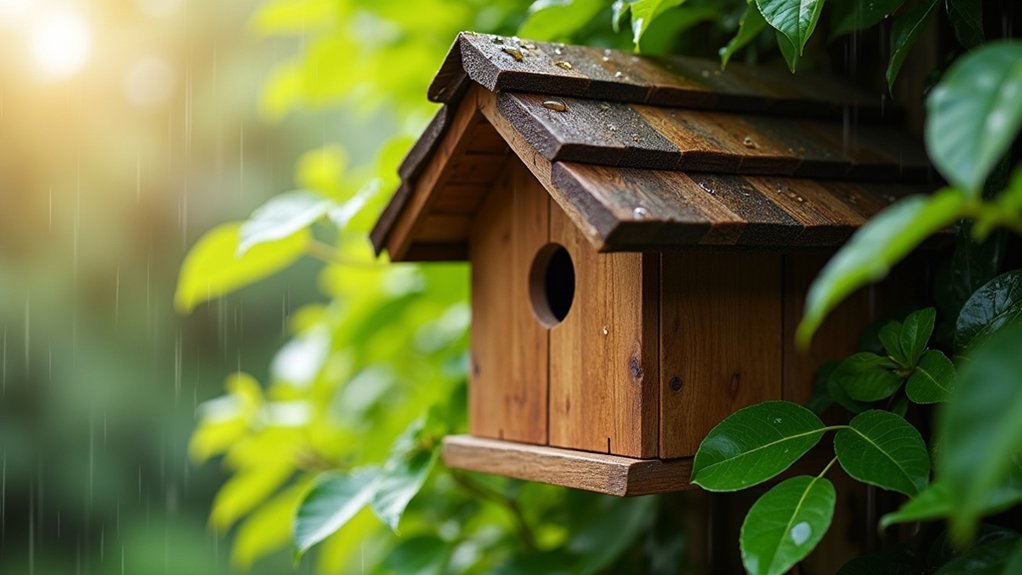
Strategic Positioning to Minimize Rain Exposure
Even the most thoroughly waterproofed nest box can benefit from strategic placement that reduces its exposure to rain.
Position your nesting boxes in sheltered areas of the coop, preferably under eaves or overhangs that provide natural protection from precipitation.
Nestling boxes beneath eaves creates a natural umbrella, keeping your hens’ sanctuary dry during stormy weather.
Strategic positioning should include elevating boxes off the ground to prevent water pooling around the base. This simple adjustment markedly reduces moisture infiltration.
Choose locations that receive adequate sunlight, as this helps dry any accumulated moisture throughout the day.
Avoid installing boxes in flood-prone, low-lying areas of your yard. Instead, take advantage of natural windbreaks like trees and shrubs that shield your coop from direct rain exposure.
This thoughtful placement works alongside your waterproofing efforts to create a drier, more comfortable environment for your hens.
Creating Effective Drainage Systems
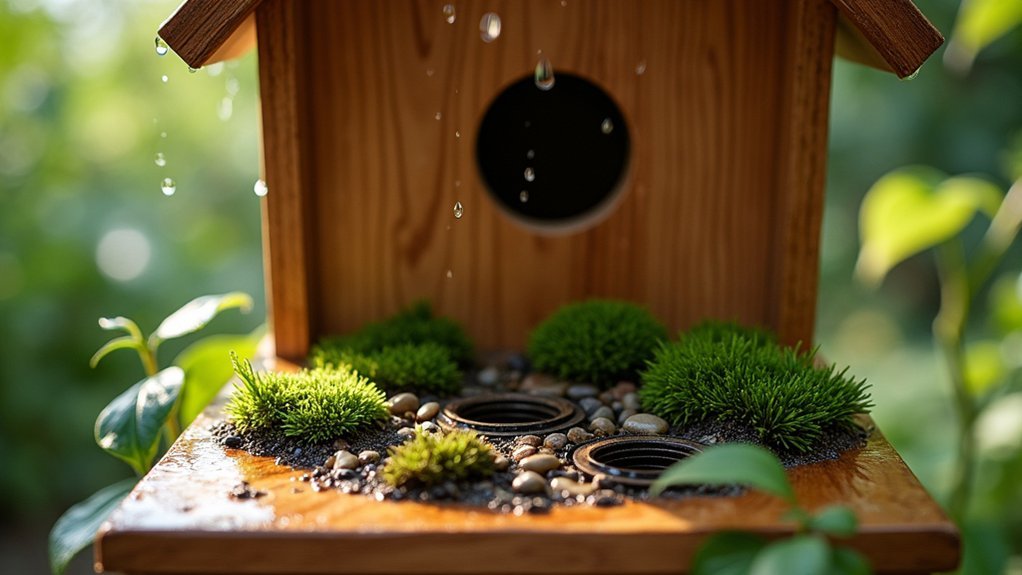
Proper drainage stands as the foundation of any waterproof nest box system. Install drainage holes at the bottom of each nest box to allow excess water to escape, preventing the moisture buildup that leads to wet bedding and unhappy hens.
Elevate your nest boxes off the ground to avoid water pooling around the base during heavy downpours. This simple strategy greatly reduces water ingress risks.
Design your nest box roof with a slight slope to direct rainwater away from the entrance and hinges.
Don’t overlook the area beneath your boxes—placing gravel or drainage mats underneath facilitates better water runoff.
Remember to regularly inspect and clear debris from drainage holes to guarantee water flows freely. A well-maintained drainage system keeps your nest boxes dry year-round.
Applying Weather-Resistant Sealants and Coatings
Waterproofing doesn’t end with effective drainage—the right sealants and coatings form your next line of defense against moisture infiltration.
Apply marine-grade polyurethane or outdoor-specific waterproof paint to create a protective barrier that prevents rot and decay while extending your nest boxes’ lifespan.
For thorough protection, use silicone sealant around hinges and seams to establish a watertight seal that blocks water during heavy downpours.
Adding metal flashing along vulnerable edges further diverts moisture away from critical areas.
Don’t apply weather-resistant sealants once and forget them.
Inspect your boxes annually and reapply sealants or coatings as needed to maintain their integrity.
This regular maintenance prevents leaks and moisture buildup that could compromise the structure and harm nesting birds.
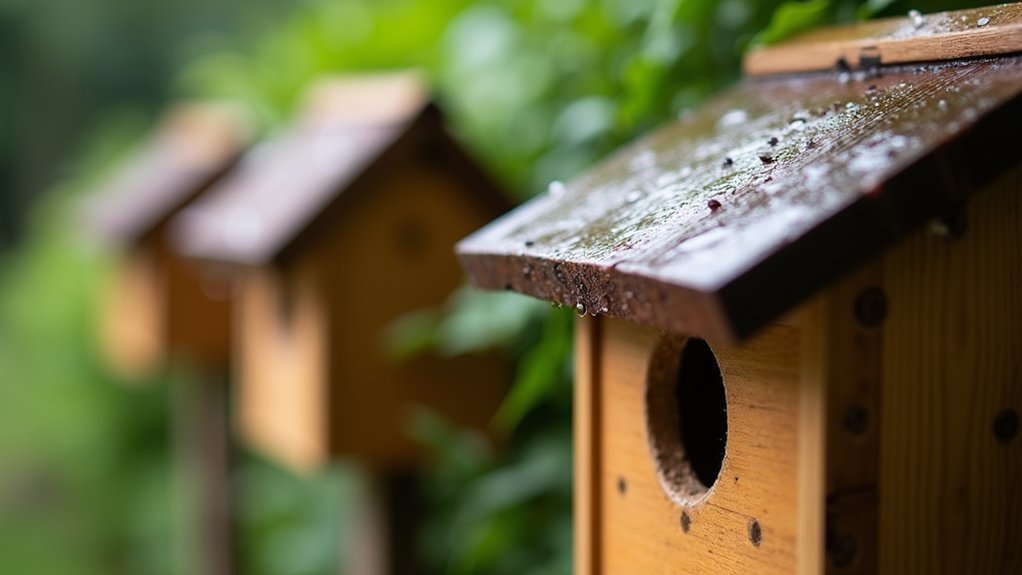
Installing Protective Roofing Extensions
While sealants provide essential protection, adding roofing extensions to your nest boxes creates a superior defense against rainfall and moisture intrusion.
A well-designed roofing extension with at least 12-18 inches of overhang greatly reduces water ingress by directing rainwater away from critical areas, particularly around hinges where leakage commonly occurs.
Opt for a sloped design to enhance water runoff efficiency, preventing pooling that leads to seepage. Marine-grade plywood or rubber roofing materials offer exceptional durability against harsh weather conditions.
When installing your roofing extension, make certain it’s positioned high enough to maintain easy access to the boxes while still providing complete coverage.
Don’t forget to inspect your extension regularly and apply waterproof sealant as needed to maintain its protective qualities throughout changing seasons.
Frequently Asked Questions
How to Make Nesting Boxes Waterproof?
To make your nesting boxes waterproof, install a sloped roof, use marine-grade plywood, apply waterproof sealant, add rubber stripping around lids, and regularly inspect seals. Don’t forget maintenance to guarantee lasting protection.
How to Waterproof Your Chicken Coop?
To waterproof your chicken coop, install a slanted roof, use marine-grade plywood, apply sealant to all joints, add drainage holes, and regularly inspect waterproofing materials. Don’t forget to create proper ventilation while keeping moisture out.
Can Chicken Nesting Boxes Be Outside?
Yes, you can place nesting boxes outside if they’re properly waterproofed, elevated from the ground, and have a sloped roof to divert rain. Use weather-resistant materials and maintain them regularly to keep your hens comfortable.
How Do You Insulate a Nesting Box?
You can insulate a nesting box by lining it with foam board or reflective insulation, adding straw bedding for comfort, installing a sloped roof with an air gap, and covering with waterproof materials.
In Summary
You’ve now got all the tools to create truly weatherproof nest boxes. By combining strategic positioning, proper drainage, quality sealants, and protective roofing, you’ll provide birds with a dry, comfortable home through all seasons. Don’t wait until after the first heavy rain to waterproof—implement these techniques now. Your feathered visitors will reward your efforts with their continued presence and successful broods.


Leave a Reply