
Build your rooftop raptor platform using 1-inch thick western cedar or cypress for durability, with a minimum size of 2.5 feet square. You'll need basic power tools and weather-resistant hardware for assembly. Position your platform on a north-facing rooftop at least 15 feet high, away from direct sun and human traffic. Don't forget to check local regulations and obtain necessary permits. The right design choices will transform your urban space into a thriving raptor sanctuary.
Essential Materials and Tools for Rooftop Raptor Platforms
When planning to build a rooftop raptor platform, you'll need to gather specific materials and tools to guarantee a successful construction.
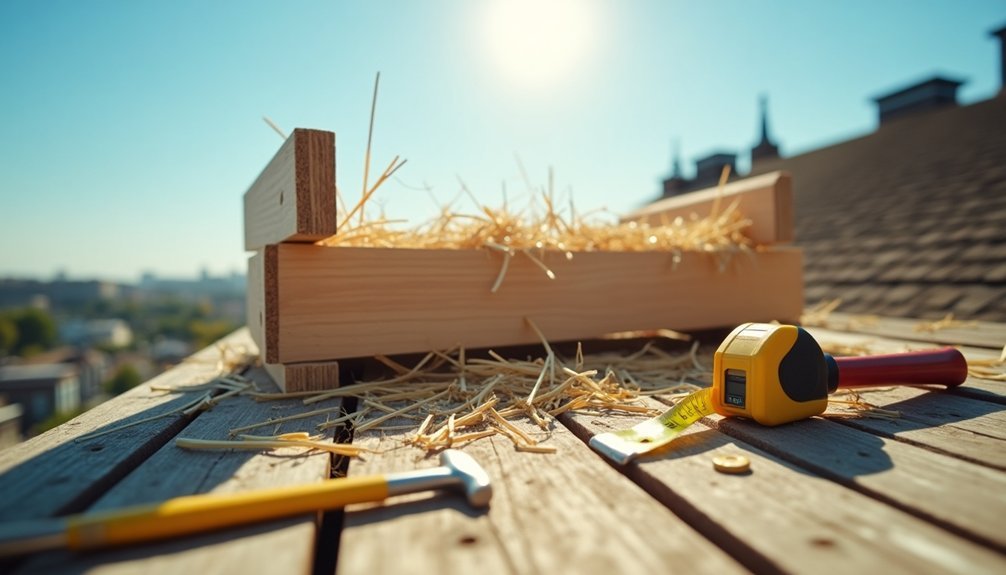
Start with 1" thick western cedar, cypress, or redwood for maximum durability in outdoor conditions. If you're on a budget, pine or plywood can work for indoor installations.
You'll want to equip yourself with both power and hand tools. A circular saw and drill press are essential for precise cuts and holes, while basic tools like hammers, screwdrivers, and wrenches will handle assembly.
Don't forget measuring tools to guarantee accuracy. For fastening, you'll need an assortment of nails, screws, bolts, and washers.
Consider adding metal supports like angle irons to reinforce the structure, especially for larger platforms that need extra stability. For enhanced weather protection, applying a bedliner coating to exposed surfaces will extend the platform's lifespan.
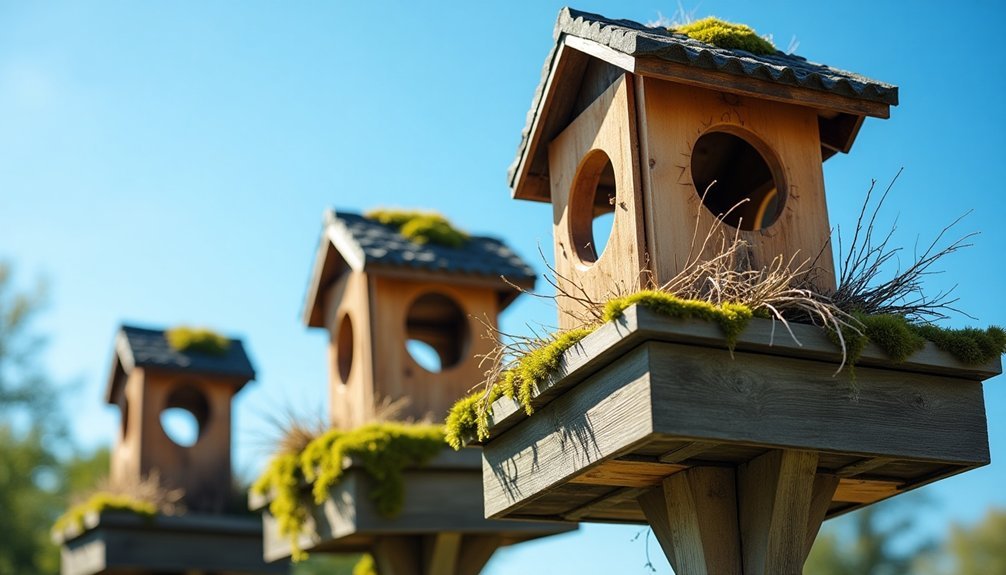
Basic Platform Design for Urban Hawks
You'll need to construct a platform measuring at least 2.5 feet square, using weather-resistant lumber like cedar or treated pine, and sturdy hardware that won't corrode.
When installing your platform, choose a north-facing rooftop location that's at least 15 feet high and away from direct afternoon sun. Research shows platforms properly designed to provide shade influenced occupancy rates among nesting hawks.
For safety and stability, you must anchor the platform securely to your roof's structure using lag bolts and waterproof flashing to prevent moisture damage.
Platform Measurements And Materials
Before constructing a raptor nest platform, understanding the correct dimensions and materials is crucial for success. You'll need a platform approximately 1 meter wide with a 45 cm depth to provide adequate space for nesting material. Chicken wire forms an excellent base structure, while wooden supports or metal frames add stability. Using 2020 extruded aluminum provides exceptional structural strength while keeping the overall weight manageable.
- Choose weather-resistant materials that can withstand outdoor conditions – recycled materials are great for sustainability.
- Create a shallow conical shape using chicken wire as your foundation.
- Install drainage features to prevent water accumulation.
- Add sturdy support beams underneath to guarantee platform stability.
When selecting materials, focus on durability and longevity. Your platform should be able to support the weight of large birds and their nests while resisting urban weather conditions.
Safe Urban Installation Steps
Now that you've gathered your materials and measurements, proper installation of your raptor platform demands careful planning and adherence to local regulations. Before mounting your platform, check with local wildlife authorities and obtain necessary permits. Similar to rooftop tent installations that take 3-4 minutes to set up, efficiency in platform mounting is crucial for minimal wildlife disturbance.
| Safety Step | Action Required |
|---|---|
| Location Check | Scout for spots away from power lines and high-traffic areas |
| Structural Review | Inspect roof integrity and load-bearing capacity |
| Wildlife Assessment | Verify distance from existing nests (minimum 100 feet) |
| Safety Equipment | Use fall protection and proper mounting hardware |
You'll need to guarantee your platform is securely anchored to withstand severe weather while maintaining proper drainage. Install educational signage nearby to inform neighbors about your conservation efforts, and develop a maintenance schedule to regularly inspect the platform's condition and stability.
Weather-Resistant Platform Construction Tips
When building your rooftop raptor platform, you'll need to select materials that can withstand harsh weather conditions, with aluminum or treated cedar being top choices for their natural resistance to decay.
You'll want to apply weather-resistant coatings only to the platform's exterior surfaces, ensuring the materials remain safe for the birds while maximizing protection against rain and snow. Following the success of RAPTOR PROTECTOR platforms, lightweight aluminum construction has proven especially effective in coastal environments.
Don't forget to incorporate proper drainage features and use stainless steel hardware to prevent rust, as these elements are essential for long-term platform durability.
Material Selection For Durability
Selecting the right materials for your raptor nest platform can mean the difference between a lasting structure and one that quickly deteriorates. For maximum durability, you'll want to use 1-inch thick rough cut western cedar, cypress, or redwood, as these woods naturally resist weathering.
While pine or plywood might work for interior placement, they're not ideal for external platforms exposed to the elements.
- Verify your wood is free from protruding nails and screws that could harm the birds.
- Treat exterior surfaces with preservatives, but leave interiors untreated to protect the raptors.
- Use weather-resistant fasteners to secure joints and prevent decay.
- Test your materials' durability before construction to confirm they'll withstand local weather conditions.
Remember to avoid cedar shavings in the nest box, as they can cause health issues for raptors. A protective layer of pine shavings about one inch thick should be added to the platform floor for optimal nesting conditions.
Waterproofing Essential Elements
Proper waterproofing stands as the cornerstone of a successful raptor nesting platform.
You'll need to apply paraffin-based treatments like Cerf Kote using paint rollers or spray bottles, guaranteeing thorough coverage at seams and mesh areas. Let each coat dry for about an hour in sunny conditions before adding the next layer. Two coats of treatment provide maximum protection against the elements.
To guarantee effective drainage, build your platform with a slight incline and install small gutters along the edges.
Don't forget to incorporate breathable materials and proper ventilation to prevent moisture buildup. Create clear pathways for water runoff, and test your waterproofing by pouring water over treated areas to verify it beads up and runs off efficiently.
Regular inspections and reapplication of waterproof coatings will maintain your platform's weather resistance throughout the seasons.
Safety Features and Drainage Systems
Because raptor safety is paramount in rooftop nest platforms, you'll need to incorporate several key protective features and efficient drainage systems into your design.
Use lightweight aluminum and galvanized hardware to guarantee weather resistance while preventing structural failures. Your platform must include a slight slope and drainage channels to prevent water accumulation that could harm eggs or nestlings. Being preassembled for setup, these platforms ensure proper installation and secure mounting from the start.
- Install perches and nest retention posts to give birds better control over their nesting area
- Create small grooves or channels that direct water away from the nesting surface
- Apply weatherproof coatings to protect against rain and snow damage
- Position the platform away from electrical equipment and human traffic
Remember to schedule regular inspections of your platform's structural integrity and drainage system to maintain a safe environment for your raptor residents.
Mounting Options for Different Roof Types
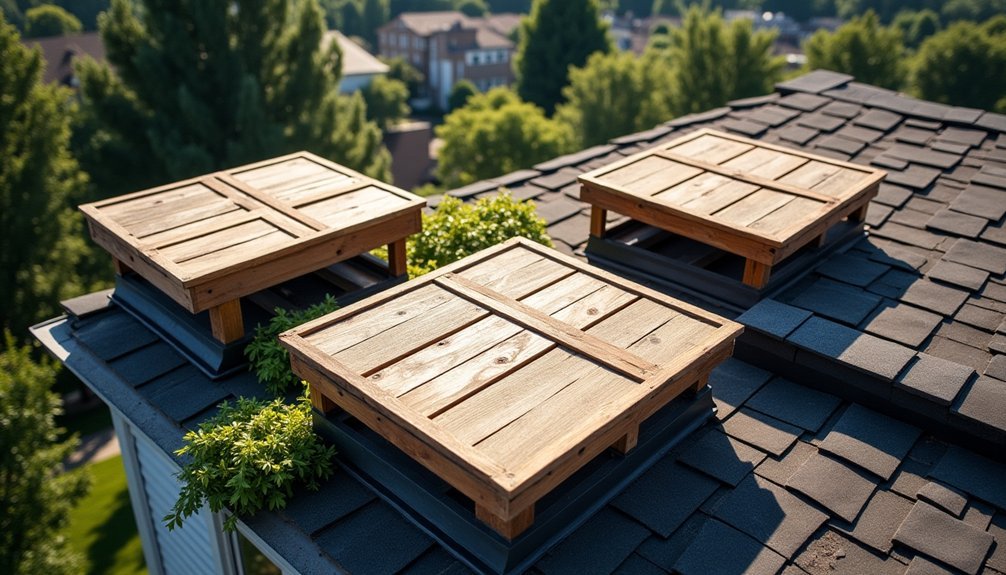
You'll find specific mounting requirements when installing raptor platforms on different roof types, with flat roofs needing secure anchoring systems that penetrate the membrane safely.
For sloped shingle roofs, you'll need to use specialized support brackets that distribute weight evenly while maintaining the roof's water-tight integrity.
Whether you're working with flat or pitched surfaces, you can adapt your mounting hardware using galvanized materials that guarantee both stability and longevity. Using clean edge cuts during platform construction ensures proper fit and alignment with roof mounting brackets.
Flat Roof Anchoring Systems
Selecting the right anchoring system for your raptor nest platform is crucial for both safety and long-term stability.
You'll want to take into account whether a permanent or reusable system better suits your needs, as both options offer distinct advantages for mounting nest platforms.
- For wood decking roofs, you can use hinged anchors that install easily with nails or screws, providing secure attachment points while allowing future adjustments. The compact design measuring 17 x 0.6 x 4 inches makes these anchors ideal for precise platform placement.
- Metal decking requires specialized steel D-ring anchors that guarantee proper load distribution.
- Permanent anchors with leak-proof flashing offer the best long-term solution, especially in areas with harsh weather.
- If you're installing multiple platforms, reusable anchors might be more cost-effective and allow for seasonal adjustments.
Choose anchors rated for significant loads and made from corrosion-resistant materials to make certain your raptor platform remains secure year-round.
Sloped Shingle Support Methods
While flat roof installations follow straightforward anchoring methods, sloped shingle roofs present unique mounting challenges that require specific support solutions. You'll need to match your mounting approach to your specific roof type for ideal safety and longevity.
| Roof Type | Mounting Method | Key Consideration |
|---|---|---|
| Asphalt | Specialized clips | Avoid shingle damage |
| Metal | Secure fasteners | Account for expansion |
| Tile/Slate | Custom brackets | Use underlying structure |
When installing on asphalt shingles, use clips that won't compromise your roof's integrity. For metal roofs, verify your fastening system can handle thermal movement. With tile or slate roofs, you'll want to anchor into the structural elements beneath, using specialized hooks designed for these materials. Remember to apply appropriate sealants and flashing to prevent water damage, regardless of your roof type.
Size Guidelines for Target Raptor Species
Three key factors determine the appropriate size of a rooftop nest platform: the target raptor species, their nesting behavior, and the anticipated growth of their nest over time.
You'll need to carefully consider these elements when planning your DIY platform to guarantee long-term success.
- Build a 3' x 3' platform for ospreys, as this provides adequate space for nest building and chick rearing.
- Install a 12" x 40" floor area with a 6" x 6" entrance for barn owls.
- Create an 8" x 8" platform with a 3" entrance hole if you're targeting American kestrels.
- Design a 13" x 13" platform with 6-8" entrance diameter for barred owls.
Remember to use rough-cut wood like cedar or redwood for durability, and guarantee your platform can support the increasing weight of the nest over time.
Incorporating Shade and Wind Protection
Creating effective shade and wind protection for your raptor platform plays a significant role in its long-term success.
Position your platform facing southeast to achieve ideal sun exposure while incorporating natural shade materials like cedar or cypress. You'll want to install a protective canopy that shields the nest from harsh elements without compromising ventilation.
For wind protection, install wood or metal screens strategically around the platform, making sure to maintain proper airflow.
Design your platform with a compact footprint and aerodynamic shape to minimize wind resistance. Don't forget to secure the structure using anchors or guy wires for added stability.
Place entrance holes away from prevailing winds, and consider adding native plants nearby to create natural windbreaks while enhancing the platform's integration with the surrounding habitat.
Building Permits and Legal Requirements
Before installing a raptor nest platform, you'll need to navigate several legal requirements and obtain necessary permits. Many raptor species are protected under laws like the Migratory Bird Treaty Act, and you'll need to guarantee your project complies with both federal and local regulations.
- Check your local zoning laws and building codes to confirm that rooftop nest structures are allowed in your area.
- Consult with wildlife authorities to determine if you need special permits, especially if protected species are involved.
- Complete an environmental impact assessment to guarantee your platform won't disturb existing habitats.
- Review community policies and neighborhood guidelines to avoid potential conflicts with residents.
Remember to schedule your installation outside of breeding seasons and maintain appropriate buffer zones to protect nesting raptors.
Maintenance and Monitoring Strategies
Once your platform is legally approved and installed, maintaining its integrity and monitoring raptor activity becomes your next priority. You'll need to conduct regular inspections, guarantee structural stability, and collect data about your raptor visitors. Consider installing weatherproof cameras to observe nesting behavior without causing disturbance.
| Maintenance Task | Frequency | Key Actions |
|---|---|---|
| Structural Check | Monthly | Inspect joints, supports, anchors |
| Weather Protection | Quarterly | Apply waterproof coating, check drainage |
| Predator Defense | Weekly | Monitor for threats, maintain barriers |
| Platform Cleaning | Bi-annually | Remove debris, check for pests |
| Data Collection | Daily | Record activity, photograph nests |
Don't forget to engage your local community in monitoring efforts. You'll find that many bird enthusiasts are enthusiastic to help document raptor activity and maintain these valuable conservation platforms.
Success Stories From Urban Platform Builders
While urban environments may seem inhospitable to wildlife, artificial nesting platforms have transformed city skylines into successful raptor habitats.
You'll find remarkable success stories from urban platform builders, particularly with ospreys showing an impressive 82% occupancy rate on artificial structures. Many builders report that their platforms outperform natural nesting sites for reproductive success.
Urban raptors thrive on artificial platforms, with ospreys claiming 82% of man-made nests and achieving superior breeding results.
- The Twin Cities Metro Osprey Watch documented over 130 active nests after implementing their platform program.
- Ferruginous hawks readily adapted to unshaded platforms in urban areas.
- Great Horned Owls successfully colonized specially designed urban platforms.
- Urban platforms benefit from existing infrastructure like power poles and light standards.
Your DIY platform can contribute to this conservation success, as these structures continue to help raptor populations thrive in city environments.
Frequently Asked Questions
How Far Should Raptor Platforms Be From Human Activity Zones?
You'll want to place raptor platforms at least 100-300 meters from human activity zones, depending on the species. Using 90% of the flight initiation distance guarantees you're providing adequate protection for nesting birds.
Can Multiple Raptor Platforms Be Installed on the Same Rooftop?
Yes, you can install multiple raptor platforms on one rooftop if you've got adequate structural support and space. Space them at least 100 feet apart to minimize territorial conflicts between nesting pairs.
Will Installing a Platform Attract Unwanted Prey Animals to My Property?
No, you won't attract unwanted prey animals by installing a raptor platform. Actually, prey species tend to avoid areas where raptors nest, as they naturally steer clear of predator territories.
How Long Does It Typically Take for Raptors to Discover New Platforms?
You'll need to be patient, as it can take several months to a year for raptors to discover new platforms. While some birds find them quickly, others may take multiple seasons before they'll start using them.
Should Existing Natural Nests Be Relocated to Newly Built Platforms?
You shouldn't relocate existing natural nests to new platforms. It's better to let raptors choose their nesting sites naturally. Instead, install platforms nearby and allow them to discover and adopt them voluntarily.
In Summary
You're now equipped to create a safe haven for urban raptors right above your home. By following proper construction guidelines, securing permits, and maintaining your platform, you'll provide these magnificent birds with a sturdy nesting site. Remember to monitor your platform's success and share your experiences with local bird conservation groups. Your DIY raptor platform can make a real difference in urban wildlife conservation.


Leave a Reply